


Booking by a member
Easily book your courts and manage your bookings in just a few clicks
Choose the sport
If your club offers several sports (summer tennis, winter tennis, squash, etc.), you can easily switch between the available sports.
Step: Click the sport selection arrow to display the full list
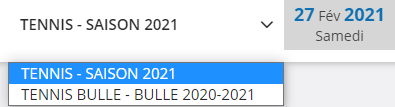
Once you have selected your sport, the calendar and court display will automatically update to show the corresponding facilities.
💡 Note: If your club only offers one sport, this option will not be visible. You will go directly to booking for that sport.
Booking mode
By default, the interface is displayed in booking mode, letting you create and manage your bookings right away.
View: In booking mode, you see the court schedule with available and occupied time slots
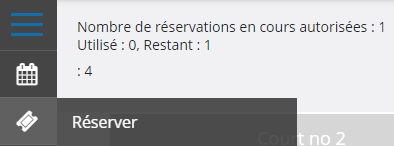
Return to booking mode: If you have left this mode, click the "booking" icon (calendar or court) in the left vertical menu to return to it.
💡 Tip: The "booking" icon is usually the first option in the menu for quick access.
Choose the date
A calendar lets you select the date for which you want to make a booking. Only available dates can be selected.
Selection: Click the desired date on the calendar
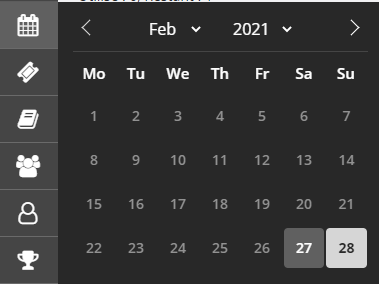
In this example, you can see February 28 highlighted. Simply click the date of your choice and the court display will update immediately to show that day's availability.
⚠️ Note: Greyed-out or unavailable dates cannot be booked. They are usually closed or already fully booked.
Book a court
Making a booking is simple: select a free time slot on the court of your choice and fill in the requested information.
Step 1: Click the first available time slot on the desired court
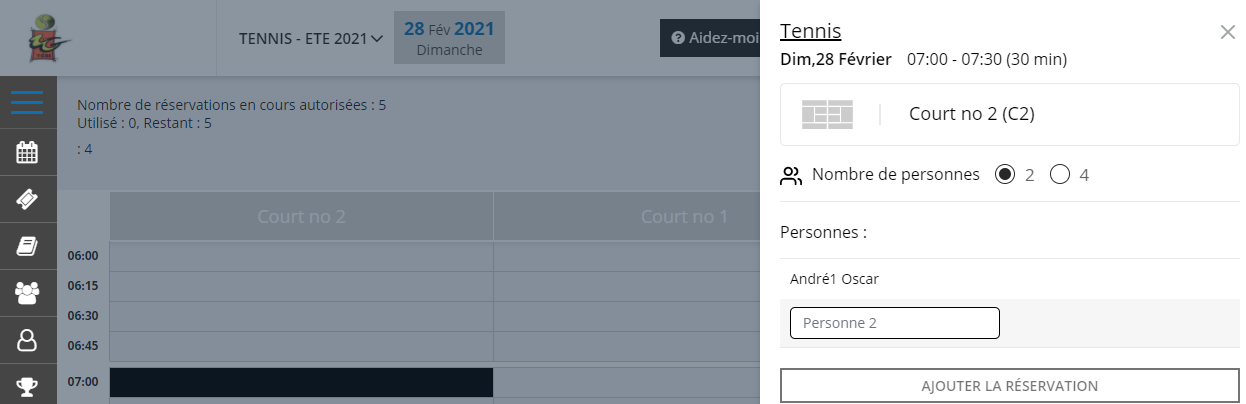
Step 2: A form appears on the right of the screen showing:
- The date and duration of your booking
- The selected court
- The number of players
Step 3: Fill in your partners' names by typing the first letters of their first or last name
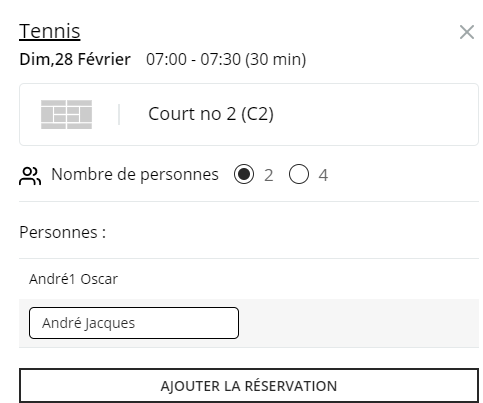
A drop-down menu automatically suggests names matching what you type. Select the partner from the list.
Step 4: Click "ADD BOOKING" to confirm your booking
Email confirmation: If the "Add a booking" option is enabled in the club settings, you will receive a confirmation email
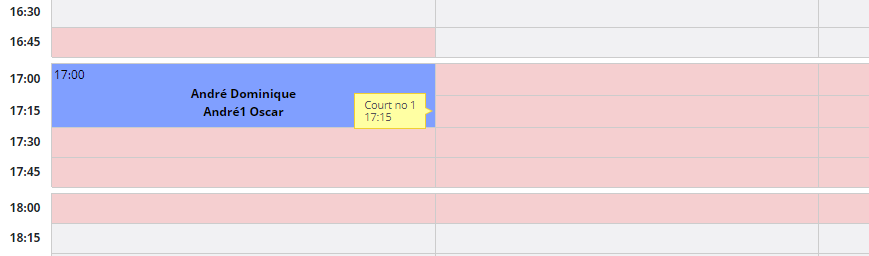
⚠️ Important: Pink fields indicate consecutive time slots not allowed under your membership package. You cannot book these consecutive slots under your subscription's rules.
Delete a booking
You can cancel your bookings at any time, subject to the deadlines allowed by your package.
Step 1: Click on your booking's area
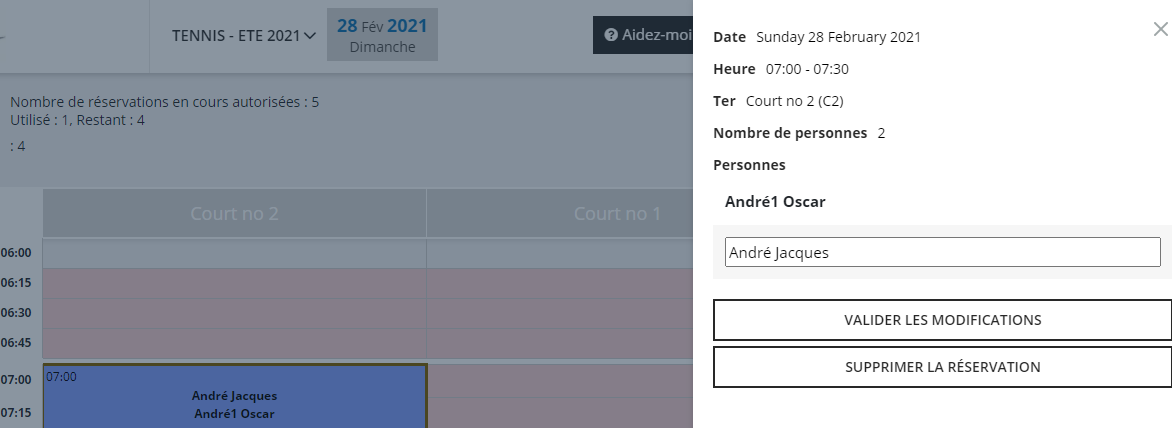
Step 2: Click "DELETE BOOKING" to cancel your booking
⚠️ Note: If the cursor shows "Not allowed", it means the cancellation deadline set by your package's rules has expired. You can no longer delete this booking. Contact the club administration if you need assistance.
Edit a booking
Want to change the players associated with your booking? It's very simple!
Step 1: Click the booking you want to edit
Step 2: Edit your partners' names
You can add or remove players by editing the name fields directly. Autocomplete helps you find players quickly.
Step 3: Click "CONFIRM CHANGES" to save your changes
Email confirmation: As with bookings, an email confirmation will be sent to you if this option is enabled
💡 Tip: You can quickly edit a booking to invite a new friend or to update the names of the participating players.
Weekly view
For an overview of the week, you can switch to the "Weekly schedule". This view shows the occupancy of all courts for the next 7 days.
Activation: Click the "Weekly schedule" icon (weekly calendar) in the vertical menu
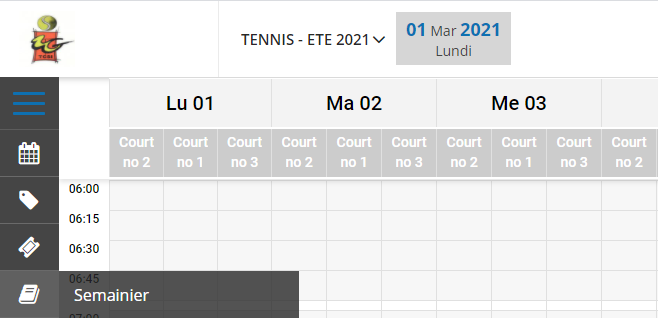
Display: The weekly schedule shows the occupancy of all courts, starting from the date you selected on the calendar.
💡 Tip: The weekly schedule view is ideal for planning your week and quickly seeing when courts are available.
Booking history
View all your past bookings to keep track of your activity at the club.
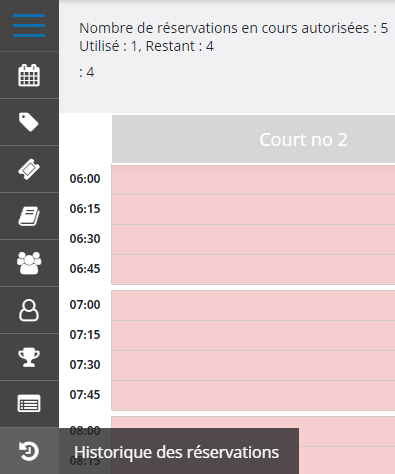
Access: Click the "Booking history" icon (usually shown as a clock or a book) in the vertical menu
View: A complete list of your past bookings is displayed, with all the details (date, time, court, partners)
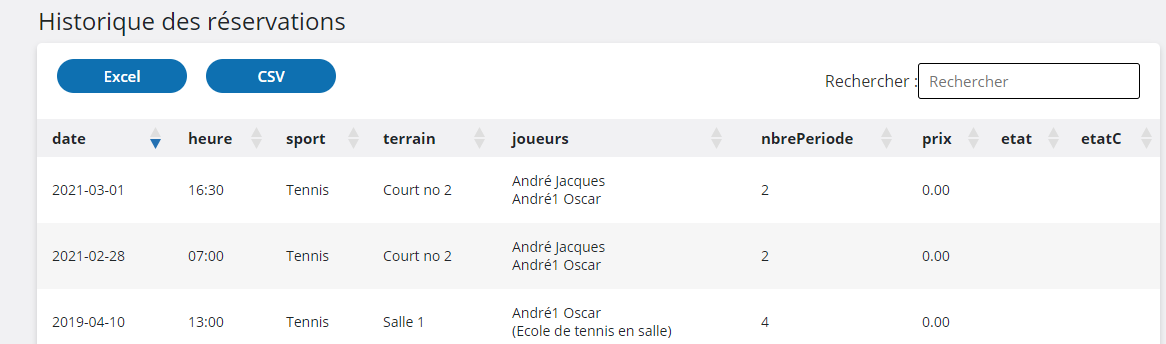
This history lets you:
- Check your previous bookings
- Track your use of the club
- Find the courts and time slots you prefer
💡 Tip: The history is very useful for planning your schedule. You can easily identify your preferred time slots and your regular partners' schedules.
Quick summary
- Select the sport: Choose your sport if several are available
- Choose a date: Click the desired date on the calendar
- Click a time slot: Select the court and time for your booking
- Add partners: Enter the names of the players joining you
- Confirm: Click "ADD BOOKING"
- Manage your bookings: Edit or delete as needed
Plugin.ch Tutorial — Member Access
Complete guide to booking your courts and managing your bookings